
Hey there! I’m one of the after-sales engineers here at Blue Elephant CNC, and trust me, I talk to woodworkers and engravers every single day about the biggest question they have after buying a machine:
“Which bit do I use for this job?”
It’s true—your CNC router is only as good as the bit spinning in its spindle. Different tasks need different tools. No more guessing! We’ve distilled our years of experience into this quick-reference guide to help you perfectly match the right CNC router bit to your project.
I. The Big Three: CNC Bit Types at a Glance
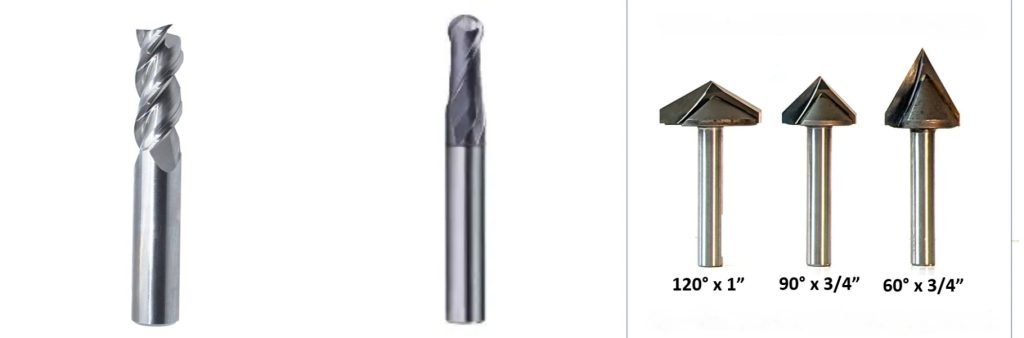
CNC bits can look overwhelming, but they mostly fall into three major families, defined by their shape and purpose:
| Bit Type | Primary Use Case | Key Characteristic | Advanced note |
| End Mill (Flat/Square) | Cutting, slotting, pocketing, creating 2D profiles. | Flat tip creates a sharp corner in the material. | Use short flute lengths whenever possible to minimize deflection and chatter — critical for precision parts. |
| Ball Nose | 3D contouring, detailed carvings, smooth-surfaced projects. | Rounded tip leaves a smooth, curved finish. | Step-over dramatically affects surface quality — reducing from 10% → 5% can halve your finishing time later. |
| V-Bit (Engraving Bit) | Lettering, signage, chamfering, creating v-shaped grooves. | Pointed tip allows for variable line width (V-Carving). | Use larger angles (90°) for bold letters and sharper angles (30°–60°) for fine engraving. |
II. Deep Dive: Understanding Bit Characteristics
Beyond the shape, a few simple terms will help you understand a bit’s performance.
1. Flute Design: More Than Just Edges
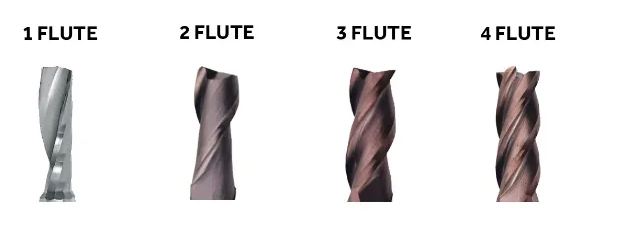
Flutes are the spiral cutting edges that remove material. The number and geometry dramatically affect chip removal, cutting speed, and finish quality.
- Single Flute: Excellent for fast chip evacuation in soft materials like plastics and aluminum. Ideal for high feed rates.
- Double Flute: The most versatile workhorse for woodworking. Provides a good balance of strength, cut quality, and chip removal.
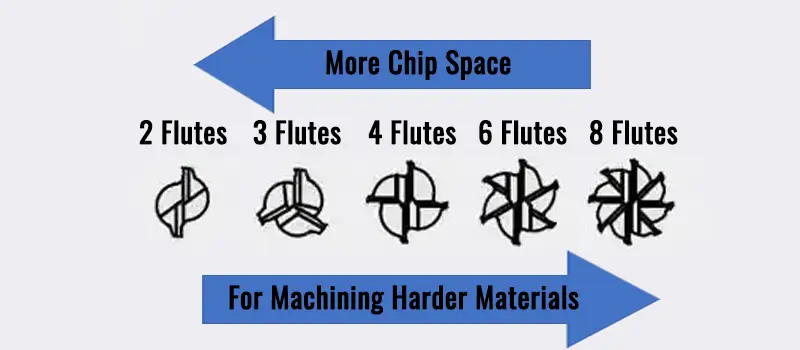
- Three or Four Flutes: Best for achieving a smoother finish in harder materials. They cut finer but require slower feed rates and powerful spindles to clear chips effectively.
💡Advanced insight:
More flutes = smaller flute valleys = reduced chip clearance. That’s why 4-flute bits burn wood, but shine in carbon fiber or phenolic.
2. Cut Direction: Up, Down, or Compressed?
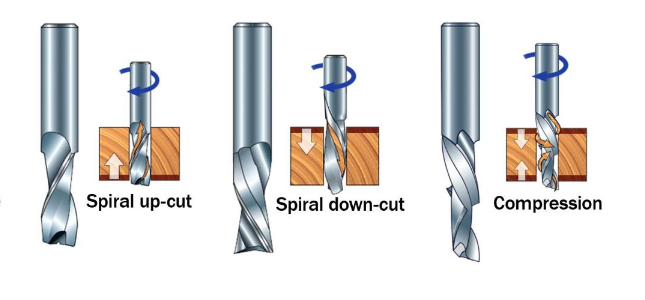
This refers to the spiral direction of the flutes and how they direct chips, crucial for surface quality on layered materials like plywood.
- Up-Cut Bit: Flutes pull chips upward and out of the cut. Best for deep cuts and efficient chip removal in solid materials. Result: Clean bottom surface, but may cause splintering on the top surface.
- Down-Cut Bit: Flutes push chips downward into the cut. Excellent for holding down thin materials and leaving a clean top surface. Result: Chips can pack in the cut, and the bottom surface may be frayed.
- Compression Bit: The ultimate solution for sheet goods. It combines an up-cut section at the tip and a down-cut section higher up. This presses the top layer down and the bottom layer up, resulting in clean, splinter-free edges on both sides of materials like plywood or MDF.
💡Advanced tip:
Start your cut deeper than the upcut length (usually 3–4 mm) so the downcut section engages fully.
3. Helix Angle: Optimizing for Material & Chip Flow
The helix angle—the angle between the cutting edge and the centerline of the tool—profoundly influences how smoothly a bit enters the material, how it evacuates chips, and the final surface finish.
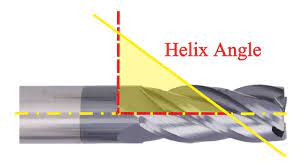
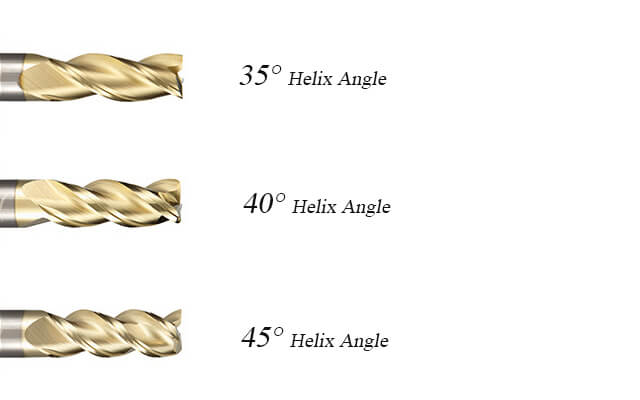
- Low Helix (20°–30°): Best for metals and hard plastics. The shallow angle provides a stronger, more rigid cutting edge that resists deflection and absorbs vibration, ensuring stable cuts in tough materials.
- Medium Helix (30°–40°): The versatile choice for general woodworking (plywood, MDF, solid wood). It offers an ideal balance between smooth chip evacuation and sufficient edge strength for clean, efficient cuts.
- High Helix (40°–55°): Designed for fast, clean chip evacuation in stringy woods or aluminum. The steep angle aggressively pulls chips up and out, reducing heat buildup and improving surface finish, but may exert more pull on the spindle.
💡Advanced insight:
High-helix tools reduce tool load at high feed rates due to smoother chip flow — essential in high-speed furniture production.
III. Matching the Bit to Your Processing Needs
| Your Project Goal | Recommended Bit Type(s) | Why We Choose It |
| General Cutting/Sizing (Plywood, MDF) | Compression Bit, Double Flute End Mill | Compression leaves clean edges on both sides. Double flute is fast and reliable for rough cuts. |
| Detailed 3D Carving (Reliefs, Sculptures) | Ball Nose Bit (Smaller Diameter) | The rounded tip creates smooth, contoured surfaces without sharp stair-stepping.。 |
| Engraving Letters/Signage | V-Bit (90° or 60° angle) | The V-shape creates professional, sharp lettering with variable width depth (V-Carving). |
| Pocketing (Creating a recess) | End Mill (Flat), followed by a Ball Nose (for rounded pockets) | The flat bottom ensures a perfectly level pocket floor. Ball nose cleans up rounded corners. |
| Edge Profiling/Chamfering | V-Bit, Specialized Round-Over Bit | V-Bits create a straight bevel; Round-Over bits create a smooth, curved edge. |
IV. Beyond the Basics: Advanced Bit Selection
For those pushing the limits of their CNC or working with specialty materials, understanding these advanced options is key.
1. Bits for Specialized Materials & Effects
Move beyond standard woods and plastics to tackle challenging materials or create distinctive finishes that elevate your projects.
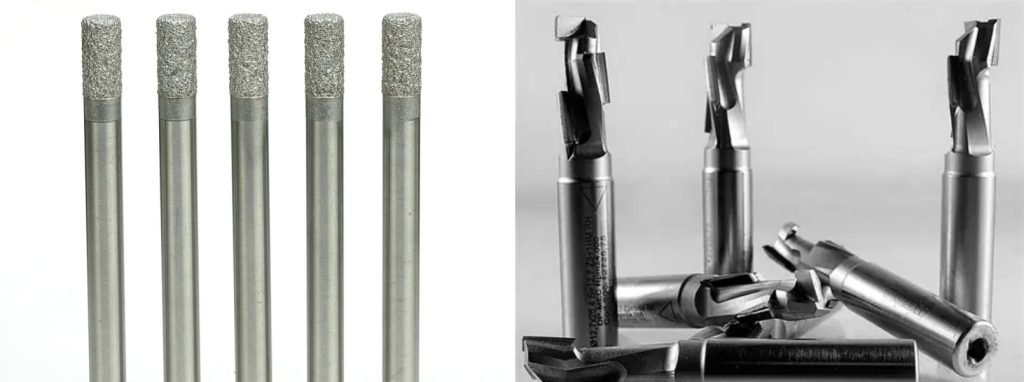
- For Composite Materials: When cutting carbon fiber, fiberglass, or laminated panels, diamond-coated or PCD (Polycrystalline Diamond) bits are essential. Their extreme hardness resists the rapid abrasion that destroys standard carbide bits, ensuring clean cuts and long tool life.
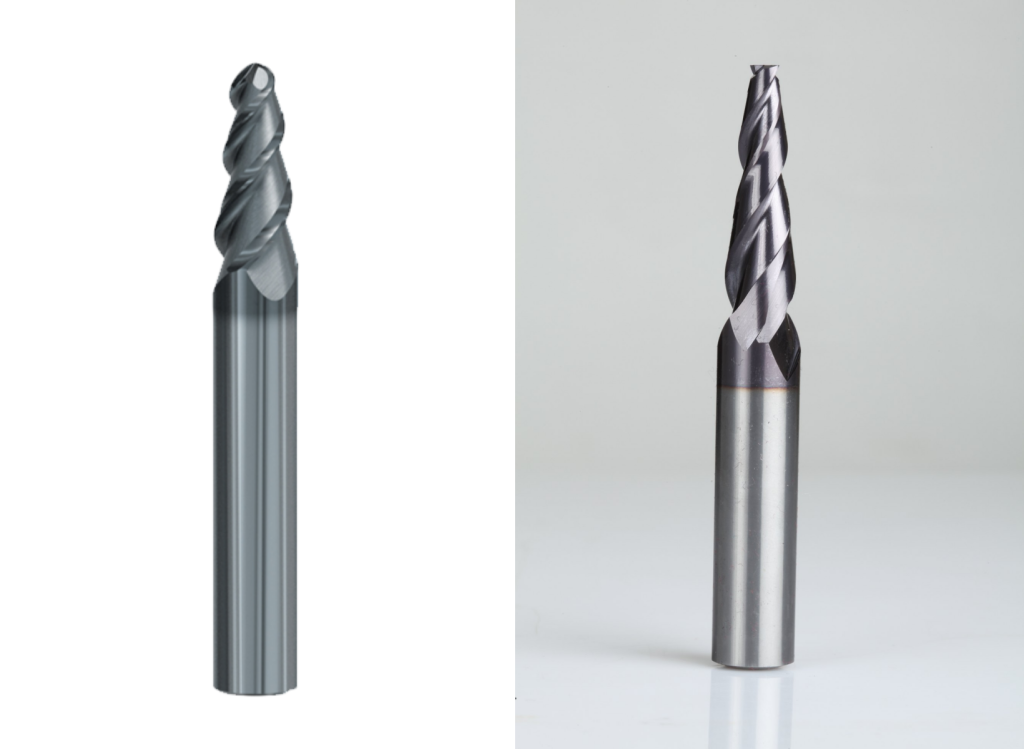
- For High-Precision & Fine Detail: Tapered Ball Nose and Tapered End Mill bits are the secret weapons of intricate 2.5D and 3D carving. The tapered design provides rigidity at the shank while achieving a fine point, allowing for deeper cuts and sharper internal corners than a straight bit of the same tip diameter.
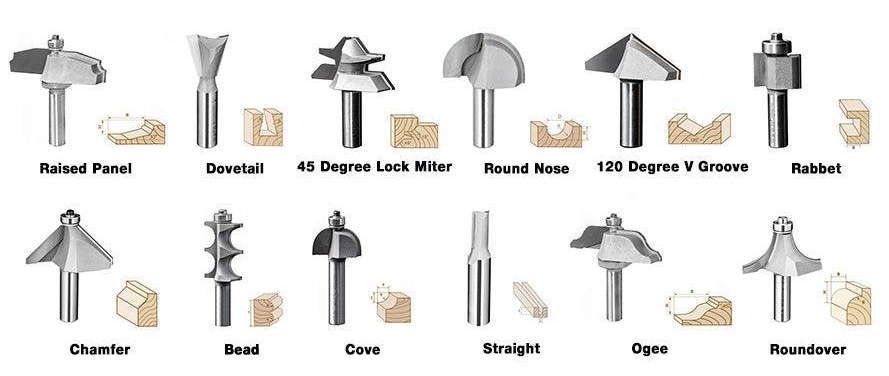
- For Decorative Edges & Moldings: Transform plain edges with specialized profile bits. Create classic Roman Ogee, elegant Cove, or robust Dovetail joints directly on your CNC router, expanding its functionality into traditional woodworking domains.
2. Tool Coatings: Extending Bit Life
A good coating can significantly reduce wear, friction, and heat, allowing for faster feeds and longer intervals between sharpening.
- Uncoated: Standard for general woodworking. Cost-effective but wears faster in abrasive materials.
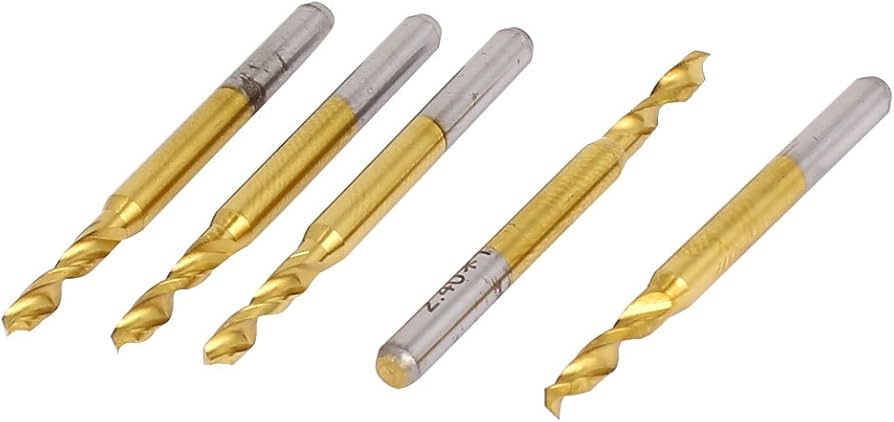
- TiN (Titanium Nitride: Gold-colored. Good all-purpose coating that increases hardness and heat resistance.
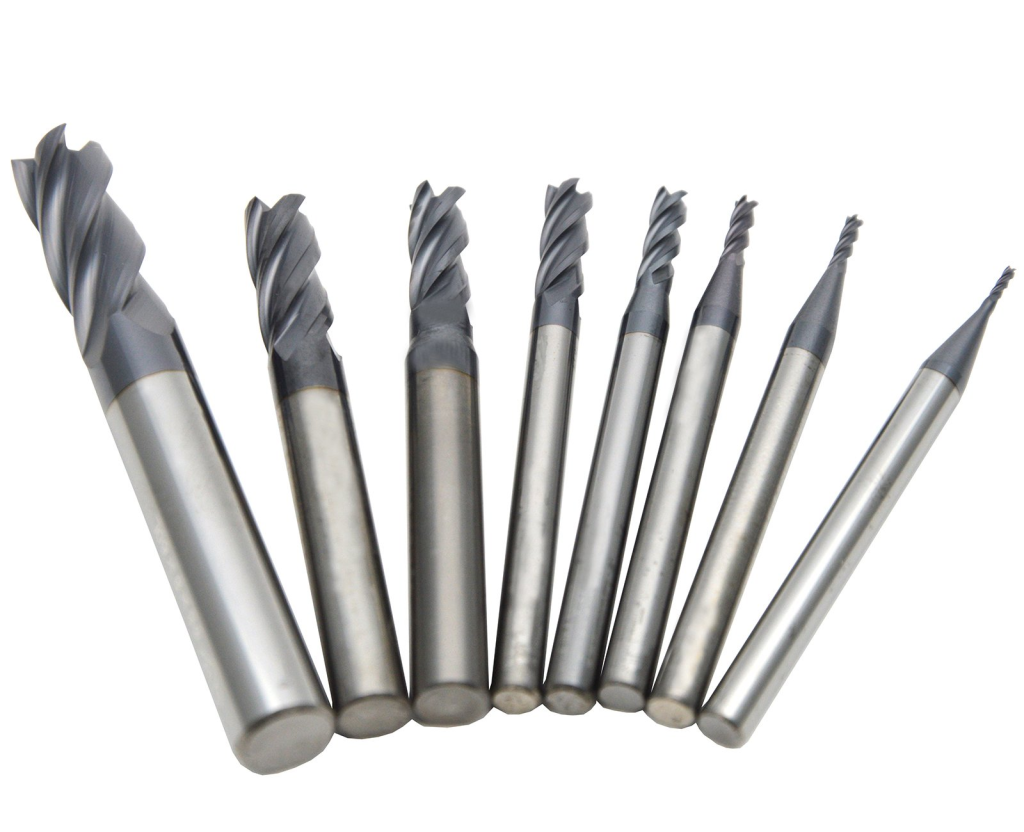
- TiAlN (Titanium Aluminum Nitride: Dark purple/bronze. Superior for high-heat applications like cutting metals or dense composites.
V. Optimizing Performance: Feeds, Speeds & Holding
Choosing the right bit is only half the battle. Running it with the correct parameters is what delivers professional results.
1. Mastering Feeds and Speeds
This is the critical relationship between spindle speed (RPM), feed rate (IPM), and chip load. Getting it right prevents bit breakage and burning.
The Golden Rule: Chip Load
This is the most critical number. Chip Load refers to the thickness of the material removed by each cutting flute in one revolution. It’s calculated as: Feed Rate (IPM) / (RPM × Number of Flutes).
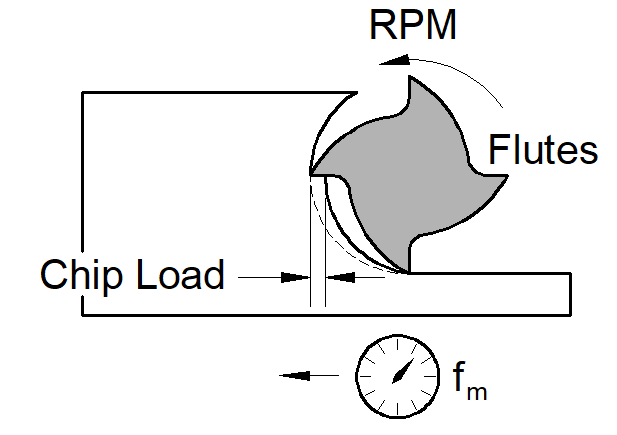
- Too Low: The bit rubs instead of cuts, generating excessive heat. This quickly dulls the bit, can melt plastics, and burns wood.
- Too High: The bit is overloaded, taking too thick a “bite.” This causes deflection, vibration (chatter), poor finish, and risks breaking the tool.
- Just Right: The bit shears away material in clean, curled chips, efficiently removing heat and producing a smooth surface.
Finding Your Starting Point: The Feed & Speed Dial
Use these practical adjustments as a guide when test-cutting:
- Chasing a Smoother Finish? Increase RPM or Decrease Feed Rate. This reduces chip load for a finer cut.
- Need to Remove More Material? Decrease RPM and Increase Feed Rate (within safe chip load limits). This increases material removal rate.
- Hearing Chatter or Squealing? This usually indicates vibration. Try decreasing RPM and increasing Feed Rate (again, while minding chip load), or switch to a more rigid (shorter, larger diameter) bit.
2. Secure Tool Holding: The Foundation of Precision
A wobbling bit destroys finish quality and is dangerous. Proper collets and maintenance are non-negotiable.
- Quality Collets Matter: Invest in precision collets (like ER series) that provide even, strong grip around the entire shank. Avoid worn or low-quality collets that cause runout.
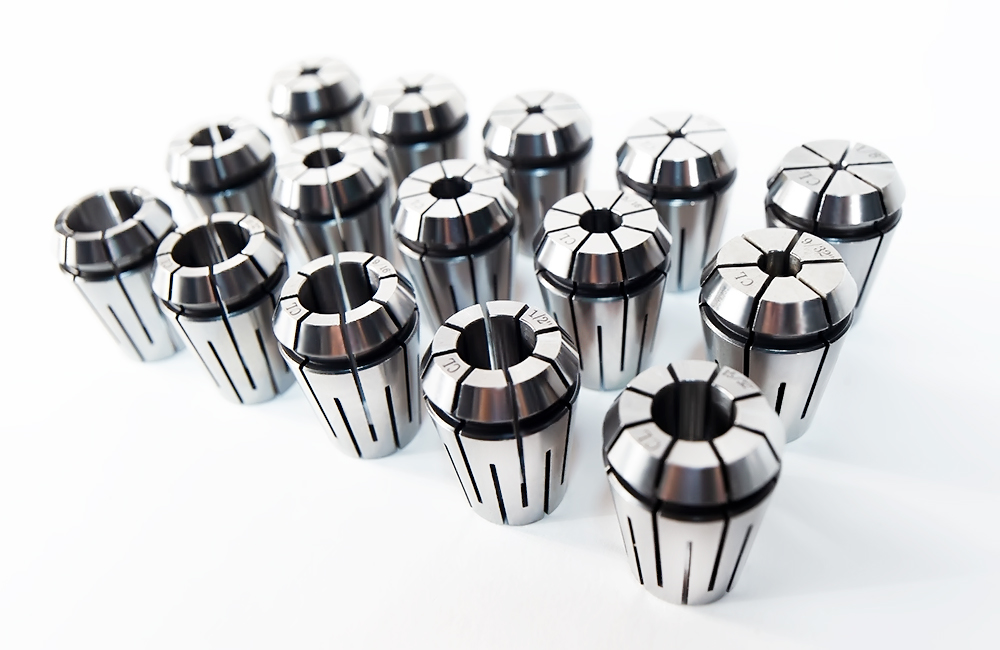
- Cleanliness is Key: Keep the collet and tool shank spotlessly clean. A tiny speck of dust can cause imbalance and reduce grip strength.
- Grip Length Matters: Insert the tool shank deep enough into the collet (typically the full grip length, but consult your holder’s manual). A firm rule is to never grip less than 3-4 times the tool’s diameter.
VI. Safety & Maintenance: Protecting Your Investment
Working with high-speed rotating tools demands respect. Proper care ensures safety and maximizes the lifespan of your expensive bits.
1. Essential Safety Practices
Always prioritize safety to prevent accidents and material waste.
- Wear PPE: Always use safety glasses or a face shield. Hearing protection and dust collection/respiration are also crucial.
- Secure Your Workpiece: Ensure the material is firmly clamped or held by vacuum. A shifting workpiece can break bits and cause dangerous projectile.
- Listen and Observe: Unusual noises (squealing, chattering) or excessive vibration are immediate signs to stop the machine and check your setup, feeds, or speeds.
2. Bit Maintenance & Storage
Treat your bits well, and they will return the favor with consistent performance.
- Cleaning: Remove pitch and resin buildup from woodworking bits regularly using a dedicated bit cleaner or appropriate solvent.
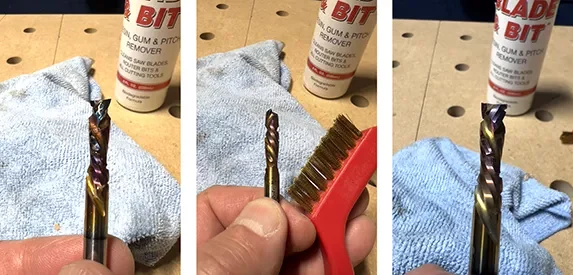
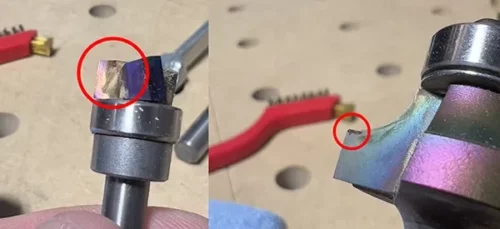
- Inspection: Before each use, inspect bits for chips, cracks, or dull edges. A dull bit requires more force, produces poor finishes, and is a safety hazard.
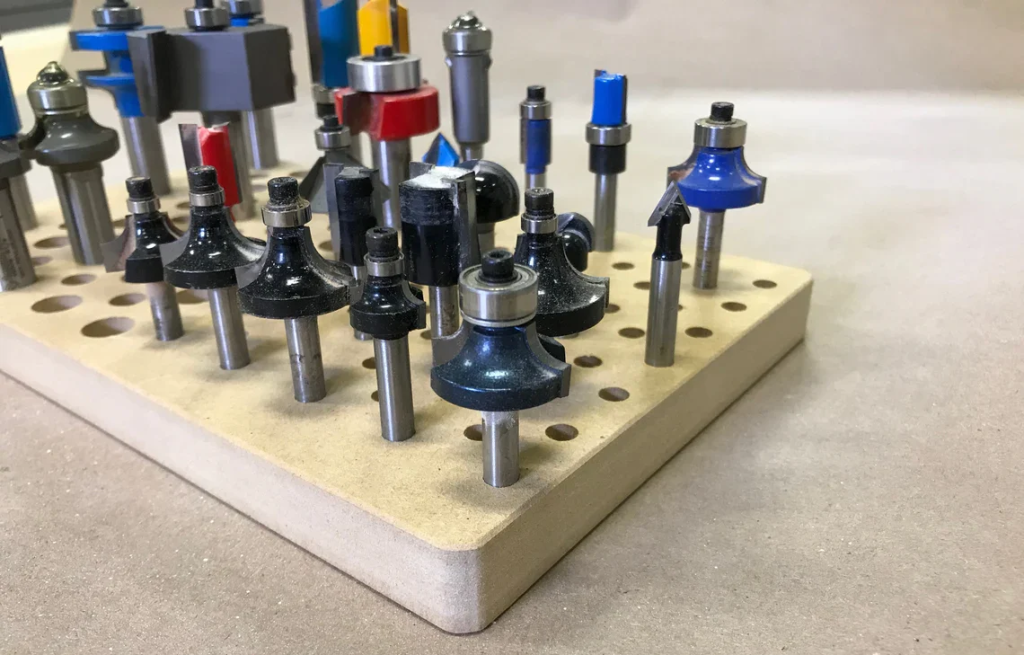
- Proper Storage: Store bits in an organized case or rack with individual slots. This prevents them from knocking against each other and damaging the cutting edges.
VII. Need Expert Advice? We’re Here for You!
At Blue Elephant CNC, we don’t just build the machines; we run them daily. Collaborating with thousands of customers annually gives us unmatched insight into real-world bit performance across all materials.
If you’re staring at a new project and still have doubts about the right bit, material speed, or feed rate—contact us! Our professional pre-sales and after-sales team is ready with 24-hour online support in multiple languages. We’re here to ensure your projects are a success!
You May Also Like:
Take You Get The Best Free CNC CAD Software